If pests worry you, know roach cost early. This guide links price, causes, and DIY steps. Read on. Cut cost. Pick a pro when needed.
Why roach cost changes
Roach cost shifts. The size of the bug group, the type of roach, and your home shape change the bill. Key points:
• Infestation size – Few roaches cost less than many roaches.
• Species – Small roaches breed fast. Larger roaches may need one treatment.
• Treatment type – Baits and gels cost less than chemical sprays or repairs.
• Home size – Small homes cost less than large homes or multi-unit spaces.
• Service calls – One call costs less than many monthly visits.
• Extra work – Heat, sealing, or cleaning add to the bill.
Typical price ranges
Below are price guides for roach control:
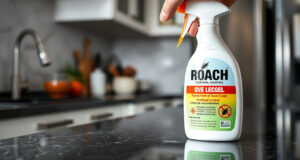
• DIY (shop baits, gels, sprays): $15–$100 for a first round.
• One pro visit for a small bug group: $150–$400.
• Many visits for a larger bug group: $300–$900 spread over 2–6 visits.
• Ongoing plans: $40–$100 per month.
• Special treatments (heat, fumigation, repair): $500–$2,500+ as needed.
These values shift with local work fees and seasons. In big problems, like in an apartment building, cost may share or jump up as bugs return.
How to choose between DIY and a pro
Your choice links to bug number and your ease with work.
• Try DIY if a few roaches are seen in light.
• Call a pro if many bugs, young roaches, droppings, or egg cases appear or if bugs come back. This also holds if you live in a multi-unit place.
A pro has strong bug-kill tools and skill. A careful DIY plan, with baits and sealing, can help in small cases and lower cost.
Step-by-step DIY plan
Follow this list. Each step ties to the next:
- Inspect – Look in kitchens, under sinks, behind machines, and near pipes.
- Clean – Wipe counters, store food tight, and clear crumbs.
- Cut water – Fix leaky pipes, dry sinks, and air out baths.
- Set baits and gels – Put small products in cracks and along walls.
- Place traps – Glue boards show bug trails.
- Seal gaps – Use caulk on pipes, vents, and wires. Add door sweeps.
- Check again – Watch for 4–6 weeks. Replace baits when needed.
These steps link cleaning to bug control. Follow labels and keep baits from pets and kids.
Tips to save cost yet keep results
Some moves keep costs low:
• Mix DIY with one pro visit – Get a pro to check your home and then work yourself.
• Buy good baits – Gels and bait stations work more per dollar than sprays.
• Change methods – If one bait fails, pick a new one.
• Talk about plans – Ask for lower prices and check 2–3 companies.
• Seal gaps – Patching leaks and cracks will keep bugs out long term.
Health risks and why treatment counts
Roaches spread germs and allergies. This links to breathing issues for kids and others. Slow work makes bug parts spread. See the CDC (https://www.cdc.gov/parasites/cockroaches/index.html) for more.
When a pro makes sense
Call a pro when bugs multiply beyond your work. A pro is sound when:
• You see egg cases or many young bugs.
• Bugs persist after your work.
• Neighbors may bring bugs back.
• You need a paper record of treatment for rules or licenses.
A pro may add visits or give a guarantee against bug return.
What to ask pest experts
Before hiring, get clear answers:
• Ask for a written cost and a plan.
• Ask which bug-kill chemicals and where they go.
• Ask if there is a guarantee and if extra visits cost extra.
• Ask for proof of license and look for reviews.
A clear plan from the expert builds trust—even if the cost is a bit higher.
Quick checklist before you call a pro
• Note bug sights (snap photos or count traps).
• Clean up clutter and food.
• List treated places and products used.
• Prepare safety questions if kids or pets live with you.
This list helps the pro set a fast plan and true cost.