Leaks in a home can feel like a nightmare. They cause water damage and push your water bill higher. They can bring mold that threatens health and drop your home’s worth. With some know‐how and a few tools, you can often fix leaks yourself. This guide breaks down leak types, shows you how to spot them, and gives clear repair tips. Get ready to build your home repair skills.
Understanding Common Types of Leaks
Before you fix a leak, find its source. You see four main leak types in most homes:
1. Faucet Leaks
A worn washer or O-ring can cause a faucet to drip. This small leak can waste water over time.
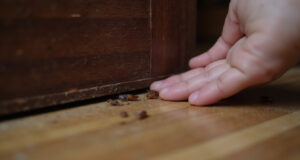
2. Pipe Leaks
Leaks in pipes hide in walls, ceilings, or floors. Corrosion, movement, or cold can start a leak. They are hard to see at first.
3. Toilet Leaks
If a toilet leaks from the tank or base, water runs or pools on the floor. A broken flapper or old seals can be the cause.
4. Roof Leaks
A roof leak can damage your home’s structure. Poor shingles, broken flashing, or blocked gutters may let water in.
Identifying Leaks: Early Detection Is Key
See these signs when a leak happens:
- Water stains on ceilings or walls
- A higher water bill with no extra use
- The sound of water dripping when nothing runs
- Damp spots or mold in odd places
Tools and Materials Needed for Leak Repairs
Keep these tools close when you repair leaks:
- An adjustable wrench
- A set of screwdrivers
- Plumber’s tape
- Pipe clamps
- Epoxy putty or leak sealant
- Spare parts like washers and O-rings
- A bucket or bowl to catch dripping water
Step-by-Step Guides to Common Leak Repairs
Repairing Faucet Leaks
- Turn off the water under the sink.
- Remove the faucet handle with a screwdriver.
- Check the washer and O-ring. Replace them if they look old.
- Put the parts back and turn the water on. Check if the leak stops.
Fixing Toilet Leaks
- Test for leaks with dye in the tank. Wait 30 minutes to see if the color shows in the bowl.
- Tighten any loose fittings.
- Replace the flapper if the leak stays.
- Flush the toilet to be sure the leak is gone.
Addressing Pipe Leaks
- Find where the water comes from. Look at pipe insulation for wet spots.
- Dry the area with a cloth.
- Press epoxy putty on small holes. For bigger leaks, use a clamp or swap the pipe piece.
- Watch the repair over time.
Resolving Roof Leaks
- Check your roof for broken or missing shingles. Look at the flashing for cracks.
- Spread roof cement or change damaged shingles.
- Keep gutters and downspouts clean to help water flow off the roof.
Tips for Preventing Future Leaks
Avoid future leaks with these tips:
- Do regular inspections of plumbing and fixtures.
- Wrap pipes in cold areas to keep them from freezing.
- Clean gutters to help water flow away from your roof.
- Study your water bill for sudden jumps that may mean hidden leaks.
Conclusion
Fixing leaks is a key skill for every homeowner. By knowing the common leaks, how to spot them, and steps to repair them, you guard your home against damage. If a repair seems too hard, call a professional. With this guide, you gain strong skills to keep your home in top shape.